Showing posts with label gardening. Show all posts

Saturday, May 15, 2010

My Inspiration

This post was written by me for the Housewife Bliss series on housewife inspiration, published in April of this year.  I thought I’d share it here with you all, in case you didn’t have a chance to read it.  Enjoy..

6HJVJZPVJHS7

Hello you all!  I hope you enjoy the read and are inspired by it...

This picture reminds me of a childhood song that roughly translates: “… a sailboat seals the sky and ocean with a blue kiss…”

Have you ever been to the beach and heard the roaring ocean, saw the seagulls crossing that fantastic Technicolor blue sky, smelled and tasted the seasalt from the foamy spray and felt the tiny bits of sand tickle your ankles? How did that make you feel?


I grew up by the sea. I remember walking to the beach with my family only minutes after the sun had come up. The sand looked amazing… as if tiny bits of gold had been left behind by the receding tide and glittered gleefully as the cool morning sun struck them. It gave me such joy to feel the wet sand creeping up between my toes and hear the wind violently sweeping my hair against my ears…
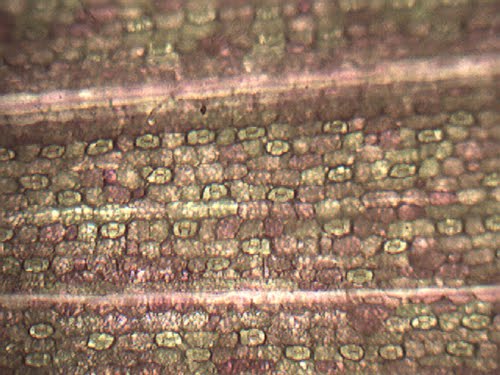

I moved away from those shores a long time ago. And even though my world is different now I have found joy and inspiration in nature -  EVERYWHERE in nature.  I ended up getting a degree in Biology, because I wanted to "see" nature thru different eyes.  It amazes me that most of us will look at a wildflower and never know how beautiful it is in the molecular level under a microscope.

Photo from The Shiny Pebble

Throughout my home, you will see this adoration for natural things:  seashells, naturally shed feathers and quills, fossils of extinct animals, live plants… fresh herbs. I have surrounded myself with bits and pieces of the natural world. I look at swirly patterns in objects and see a winding nautilus or an unfurling rosebud.  I love granite, slate, woods… and whenever possible, I will pay for natural materials over synthetic.


Even my blog name is derived from Nature's stronghold: The Shiny Pebble.  Most people don't notice the tag line at the very bottom of my blog.  It reads:  "I know not how I may seem to others, but to myself I am but a small child wandering upon the vast shores of knowledge, every now and then finding a small bright pebble to content myself with." - Plato
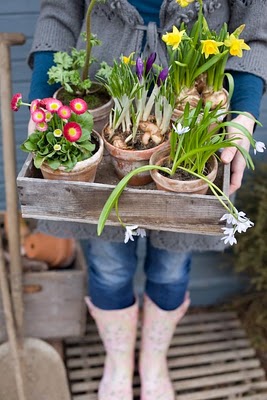

Gardening has also become part of my daily routine. It calms me down. It re-energizes me.  I would love to share a little project with you.  Herbs are such a fun little luxury and so easy to grow.  You can buy young plants from the hardware store or garden center and pop them in a pot, set them in a sunny spot to enjoy for the whole Summer.  But, they are also very easy to grow form seeds and are a fun project to do with the kids. 
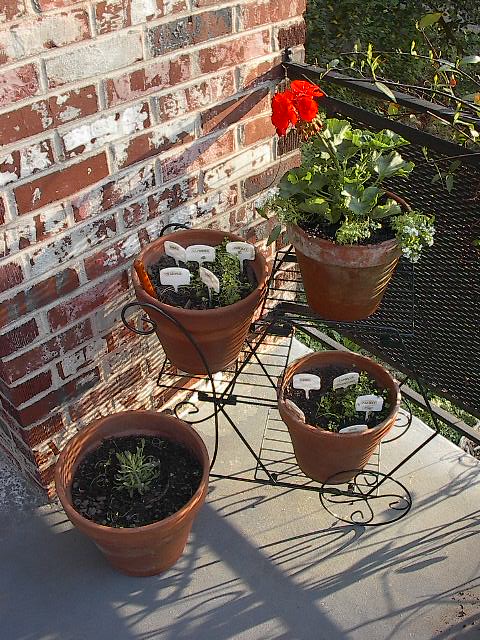
Here is a short tutorial on how to grow herbs from seeds:
Materials List: 
A medium size pot
A bag of Potting Soil
One pack of seeds
Plastic wrap
Spray bottle with clean water
Directions:
Fill pot 4/5 of the way up
Water it thru
Sprinkle seeds on top
Tap them down lightly with your finger tips
Spray the whole surface with water
Cover with plastic wrap, leaving a corner loose to vent
Set it in a shady spot and spray water on it whenever you think it may be drying up. You want the surface of the container to remain moist in order for the seeds to germinate.  So keep an eye on it. After a week, start moving the pot towards the light.  Once the little green leaves start to sprout water it through whenever it needs water.  In a few weeks you will have wonderfully fragrant herbs to use and enjoy around the house.

When I am digging in the dirt and a drop of water touches my face or a light breeze tousels my hair, something misfires in my brain and takes me back to those sweeping winds, foamy sprays and sandy toes.


While the Housewife is making her final preparations for the move back to the States, she will be hosting a series of guest bloggers in the upcoming weeks.  Please tune in.  I will be posting there on June 14th, with an article on Xeriscaping (wish me luck!).

Linking to:  Outdoor Wednesday

Sunday, May 2, 2010

Le TexMex Tuteur or The Tale of The Tomato Cage

Last weekend we had a truly Texas experience.  My in-laws came down for the weekend and we headed to do some exploring since gardening season is upon us and we all have lots of fun projects in the works.  I had heard from a neighbor about this gardening place near Pecan Grove, an old golf community only a few miles SW of Houston, Enchanted Gardens.  We geared up and headed in that direction.  The place was pretty "country", befitting to the location. 


Facade of TX town decorated a corner of the nursery
Petting Zoo keeps the kids entertained while we shop
These are fabulous and I will be going back for them.

We ate lunch at The Swinging Door... a barbecue joint that has been around for at least 20 years and only 3 miles away from the nursery.  They claim to have the best barbecue in TX, and every review I've read about the place seem to agree with that claim.  There were very few items in the menu and the barbecue sauce was served the only way barbecue sauce should be served:  piping HOT!


After lunch we hopped over to Wild West World, less than 2 miles away.  I am not sure what to call that place.  It looked like a ranch owned by very creative collectors.  On one side there was an "old town" line up of shops with names like Petticoat Ranch, Talavera, Kemosabe, and Tombstone Sale Corral.  On the other side was another TX old town facade housing a Farmer's Market.  And sprinkled throughout the place were metal works portraying life in TexMex country...


From this little excursion, I came home with an idea.  Tomato plants are so ugly and scraggly... Here is what I thought I could do to make them fit in my patio design. Get yourself a few tomato plants, a huge pot and a tuteur...


BEFORE

Enlist the help of your Mr. Darcy
Add a bunch of these cool little organic fertilizer spikes
Voila:  Le TexMex Tuteur

Sunday, April 25, 2010

Succulents

BEFORE - to my designer friends, please avert your sight!

Every Monday I have been adding a little gardening related segment.  I do this NOT because I'm an expert or even know what I'm doing, let me assure you.  Well, this week I have an easy one.  At least it was easy for me, since Mr. Darcy did most of the work...  This little sitting corner of my back patio needed some sprucing up.  We've had this little urchin pot that has been sitting empty since my last house.  Once we moved in, right before winter, I just flopped all of these pieces right there and forgot about them... Looking pretty dreary, I know.


AFTER

The plan has always been to plant some succulents in there. Well... So we did. We headed out to Lowe's today and bought as many plants as we thought we could fit in this little vessel. Then Steve stuffed them all in. Literally. We are taking bets if any of it will make it thru the end of the season.

Now, remember:

  1. If you haven't entered my giveaway, go HERE.

  2. This Wednesday is Greige's Christina Fluegge's turn at making over my dining room.  I just spent a good half an hour gawking at her talented work HERE. To see today's designer go here.
Hugs and Kisses,
Catherine

Sunday, April 18, 2010

Garden Trek Series - Episode 4

This week's Garden Trek episode is really one of my favorites.  We had this face that used to hang on a wooden fence at our house in Tulsa.  My husband built a stacked stone reservoir under it and Boston Ivy surrounded it.  Unfortunately I don't have a good picture of it, but you will be able to spot it in this picture, if you look at the fence area right under the tree in the middle of the yard:

BEFORE - I am linking this post to Metamorphosis Monday and Outdoor Wednesday
At this house, we have a side yard that is simply an eyesore.  Specially because it sits right next to the courtyard leading to the front door.  When we first moved in, this area was a bed of rocks housing several dead or dying bougainvillea plants.  Mind you, this bed is flanked by buildings and sits in the darkest side of the yard - North!  How can a tropical blooming species thrive in such location?!  I don't think that the previous owners knew much about gardening...


I have seen something similar done in gardening shows, but this was going to be a bit of a challenge.  The face weights approximately 150 lbs of solid concrete.  And we do live in hurricane land, so we had to be a little ingenuous.  My Mr. Darcy dug a huge whole and filled it with 100 lbs of concrete.  He then set an 8 foot 4''X4'' pressure treated post in it.  Afterwords, he added two blocks of 4x4s to offset it from the bushes that we would then plant behind it.  The idea is to have the face float out of the hedge.


We then set out to figure out which plant material to use.  We could have chosen any tall bushes, but the supply and cost made us select Pyracantha.  I love that plant!  Even though it has thorns, this shrub produces gorgeous fragrant white flowers in the Spring, which grow into berries in the Summer.  The berries turn a lovely shade of orange by Fall and small birds feed on them thru Winter.  We planted six Pyracantha, maybe a couple of feet apart.  They will grow into each other very quickly.  We probably used too many of them, but wanted quick results.

AFTER
Steve will add a wire spallier in the back to ensure that the plants grow in the right direction.  He has also spray painted the pole with camouflage green rustoleum.  We are still debating on whether or not we'll be adding a reservoir underneath it to get the water flowing.  I have plans to only use white flowering material on this side of the house... azaleas, white hydrangeas, and a climbing rose.  But like everything with gardening, we will be doing it slowly as the plant material becomes available.

I hope you've enjoyed this episode of my Garden Trek series.  If you haven't entered my lovely giveaway, please go here and do so now.


Also, don't forget to check back on Wednesday, when we start our new series on The Shiny Pebble Designer Challenge, or: Please, make this pebble shine again.  Blog world's most popular and talented designers will be featuring their visions for my dining room on a weekly basis, right here.  You won't want to miss it.

Sunday, April 11, 2010

How to plant herbs in a pot


BEFORE
If you think I am overdoing with the gardening segments... just you wait until Summer, when I am considering doing a ten segment series on the joys of eating seafood with your bare hands...  Fascinating stuff! 

But it is Spring after all, and there is a lot that needs to be done around here to get this house feeling like a home.  I have been growing herbs every season for at least the past ten years... and it is already almost tax day and I have not indulged.  April 15th is always a good time to put out your Summer color and your herbs, but here in TX the seedlings come in a bit earlier.  I was afraid that if I waited any longer the goods would be all gone!

My wonderful husband took a trip to the hardware store for another project he has going and I asked him to bring me home some herbs and a nice pot.  I think he did an excellent job.  He got home with this lovely pot from Lowe's. This beauty has a ridged outside and its organic bended shape is only enhanced by the aqua coloring on the inside, which will not be seen this season, but will probably make an appearance in the fall when it will be repurposed.

First things first.  Here is the list of materials:
  • One large pot with a drain hole
  • Organic potting soil
  • Herbs: we have several basil varieties, oregano, a hot pepper plant (OK, not an herb), sage, rosemary, arugula, thyme, parsley, etc etc etc
  • gloves, a digging tool, scissors (for cutting soil bag open)
We had to drill a hole, but you can find several pots with holes or a little removable plug

I found these cute gloves at Target. I love the toggles at the wrist so you can easily adjust its aperture
Here is a shot of the beautiful colors on the inside
Fill the pot with the organic potting soil leaving two inches on top to prevent a big mess when you water

I'm not growing mushrooms this year, so I added this one just for fun

Dig a whole and put the plant in, generally herbs are easy creatures whose only demand is some water when they are dry, so don't worry too much about which plant will require what. I try to plant the trailing herbs such as oregano and thyme in the front and place the taller one in the back.
Make sure to tap in at the base of the plant to stabilize it and get rid of big air pockets
Water it through... this thorough watering will get rid of any air pockets that might dry out the roots

And TA-DA...  You are all done.  Ready to enjoy the results of your not so hard work.  Everyday, check to see if it needs a drink.  Just stick your finger in the dirt down to a half and inch to one inch.  If you feel moisture, the plants are happy.  If it is dry, give it another good drink.
AFTER

These are looking a little tired right now, but once the leaves dry they will perk right up.  In a couple of days I should be seeing new growth, which usually comes in with a lighter shade of green.  Some of the herbs will be tossed out when it gets really warm... some will be transplanted in the garden in the Fall to come back again next year. 

Growing herbs is so easy and rewarding.  Just brushing by the leaves and enjoying the fragrance is an experience to share with your kids and loved ones.  Add to that the benefit of having fresh herbs to enhance any boring ol' meal...  They become indispensable to me.  I hope you give it a try.


Don't forget to stop by on Wednesday... Great adventures are ahead of us with a new series I will be unveiling...  It involves some fabulous bloggers who are willing to share their talent with all of us.  But that is all I am saying for now!  I promise you it will not disappoint!


Springboarding from a Spring Onion


I just sat down to take a quick look at my daily blog read and the very first blog inspired me to write this.  I was visiting PVE Design, a blog by a very talented artist whose work you see all over blogland.  Go check her out. She posted on Spring Onions this morning.  I started commenting on it and thought it was getting so long that the comment deserved its own post.

Celebrating Spring plantings, but not necessarily part of my Garden Trek series...

The Green Onion (also known as scallion, spring onion, Welsh onion) is an edible little plant from the genus allium.  The same family as the shallots, but a different species.  My understanding is that the green onion is just a baby version of the ubiquitous large onions.

They are extremely easy to grow.  Here is all you have to do:

  • Buy a pack of starter seed onion from a hardware store or garden center.  You can grow all sorts of varieties:  regular yellow onions, red onions, sweet onion...
  • Place a few of the bulbs about half an inch from the top of some soil in your garden bed or in a pot, wait a couple of weeks and plant some more. By 3 to 4 weeks, you will have a succession of fresh green onions to enjoy.  Just remember to keep the bag of unused bulbs in the refrigerator.
  • Continue to plant as you harvest and you will have fresh green onions through the whole growing season. Don't forget to plant enough to share with the neighbors.
Also be sure to wash it really well inside the folds of the blades. Green onions are notorious for harboring harmful bacteria.  These little fellows are delicious, easy to grow, and they even look good in arrangements, albeit a little stinky.

Sunday, April 4, 2010

Garden Trek Series - Episode 3


People, when you are trying to sell your house, PUHLEASE, do something with its curb appeal.  In this stale housing market that might just be the little thing that sets your home apart from the other gazillion homes out there going for a bargain.  When we were looking for ours, Steve had to twist my arm to get me to look at this one.  I could hardly get past this...


And these pictures were taken after I moved in and had the rosebushes trimmed and dead azaleas removed, and planted some pansies so I wouldn't be too embarassed when my family visited at Christmas.  I don't think these people ever ran their sprinkler system.  And if they did, it was set for everyday for 8 minutes per station.  My understanding is that you don't water everyday, but only when rainfall is less then 1 inch in a week.  Either way... everything was looking pretty dry, dead, and depressing.

Here is what we did with the front bed.  It may not look like much, but just wait until the end of the growing season.  A little time will do wonders to this bed...
    notice the arbovitae that was moved to the left of the courtyard, anchoring that side of the house

  • Removed an arbovitae from the corner of the garage and replaced it with sweet olive (Osmanthus Fragrans) so that we could enjoy the fragrance when in bloom as you approach the house and balance out the landscape because of the other plant introductions
  • Removed the big Sago Palm that was just sitting there smack in the middle of the flower bed and planted it in the back. 
  • Added two gorgeous Blue Star Junipers flanking the window.  I would have preferred to have had them closer to the house, but there were some pipes right where I wanted them planted
  • We added three layers of bushes:  Mock Orange dwarf in front of the window, Loropetalum, and Sunrise Winter Creeper

  • Divided all of the summer blooming bulbs/rizhomes and added some pretty grasslike blomming flowers which I have no idea what they are called
  • Planted a beautiful cone shaped holly tree at the right corner of the house
  • Extended the flower bed on the side of the house all the way to the gate, where we planted some regular Mock Orange, Creeping fig to grow up the wall and some fox tails for a change in texture.
Underneath the small window there is a palm tree that we are waiting to see if it died in the freeze
In the late Summer I will post some of these same areas so we can see how much it has filled in.  Also, I have to pick out my summer flowers and am thinking about using deep pink/purples...  Maybe the fuschia pink periwinkles, or petunias, or just load up on verbenas and sprinkle a few burgundy coleus with the chartreuse edge here and there.  What do you all think?  We are also thinking about painting all of the shutters black.  These seem to disappear.  I hated them when I first looked at the house... but now that we have a few plants growing around them, I have grown accustomed to them.  We'll see.

This is not my home, but I love how they painted the trim on the doors/windows black.  I will be doing that too to my courtyard's windows. Don't know where I got this picture, sorry.


This post is linked to Metamorphosis Monday

This upcoming week should be interesting at the Shiny Pebble. I will be writing a guest post at Housewife Bliss and Amanda from AB Home Interiors will be hippifying my dining room.  I have also recieved an award from Christina at Greige  and will be sharing some little things about myself later in the week.  Meanwhile, stop by her fabulous shop, My Sparrow.  I have placed a link to the right.  Also, I'll have an update on the Chanel Nail Polish Sweepstakes.  There is still time to enter you chance to win.  So check back and join in on the fun. 


LinkWithin

Related Posts with Thumbnails